15 best dry ice halloween experiments and display ideas

15 best dry ice halloween experiments and display ideas

15 best dry ice halloween experiments and display ideas

Dry ice is so much fun, and its smoky effect is perfect to create spooky fog for a Halloween themed lesson! 

So grab a coffee and sit back and relax while I give you 15 halloween experiments and display ideas to spook up your lessons this Halloween! 

dry ice halloween experiments and display ideas

dry ice halloween experiments and display ideas

Disclaimer: This blog post, ‘dry ice halloween experiments and display ideas, may contain links to resources that I have created for classroom use. Read full disclaimer here. activ

Background about Dry Ice:

Dry ice is the solid form of carbon dioxide (COâ‚‚). It’s called ‘dry’ because it doesn’t melt into a liquid as regular ice does; instead, dry ice sublimates, meaning it turns directly from a solid into a gas at temperatures above -78.5°C (-109.3°F). This sublimation process produces a cold, dense fog, which is why dry ice is often used in fog machines for theatrical effects.

Solid carbon dioxide is much colder than regular ice, which makes it useful for preserving food, medical supplies, and other perishable items during shipping. However, because it releases carbon dioxide gas as it sublimates, it needs to be handled in well-ventilated areas to prevent the buildup of COâ‚‚, which can be dangerous in high concentrations.

Additionally, due to its extremely low temperature, handling dry ice requires protective gloves to prevent frostbite.

dry ice halloween experiments and display ideas

dry ice halloween experiments / demonstrations:

Science experiments are a great way to engage students and take advantage of the wonder of dry ice!

1. Comparing Dry Ice and Regular Ice: Have students compare their observations of regular water ice and a small piece of dry ice.

2. Dry Ice In Water: Put a small amount of dry ice in some water.

3. Bubbles of Dry Ice: Add some dish soap to water and add some dry ice.

4. Floating Bubbles: Put some dry ice in water in a fish tank or large container. Blow some normal bubbles over the top and see them float on the top of the dry ice.

5. Balloon: Put water and dry ice in the bottom of a bottle and place a balloon over the top. Once the balloon is full of gas, tie it up and compare to a normal balloon.

6. Indicator: In a beaker of water place a squirt of universal indicator. Then add some dry ice and watch the color changes.

7. Trapped gas: Find a small bowl or cylinder with a round rim (no spout). Soak a paper towel in some detergent and water. In the bowl add water and the dry ice and then run the soaked paper towel over the rim of the dish of water to create a bubble that traps the dry ice.

8. Food Dye: Put food coloring in water and ask students whether or not the gas will be colored or not. Then add the dry ice and observe.

9. Compare steam and carbon dioxide gas: Have students compare the carbon dioxide gas and steam.

dry ice halloween experiments and display ideas

Halloween decoration suggestions:

The spectacular fog effects of dry ice make it perfect to create a spooky classroom atmosphere for Halloween festivities.

1. Jack O’Lantern: Cut out a pumpkin and put a beaker of water with dry ice inside to create a spooky halloween display using the dry ice fog effects!

2. Witch’s cauldron: Add green food dye to water and add dry ice in a witches cauldron for special effects

3. Smoking drinks: Our soft drinks are made up of carbon dioxide gas in water, there is no harm in having a little bit of dry ice in some smoking drinks! CAUTION: be sure no one ingests any solid carbon dioxide. Alternatively, use the double bowl method as described for the halloween punch below.

4. Smoking candy bowl: Place a smaller bowl inside a large one. Put the candy in the smaller bowl, and dry ice with water in the surrounding area. The spooky dry ice fog will flow out from under the candy, making it look like the treats are floating in mist.

5. Graveyard mist: Distribute dry ice in shallow dishes or trays hidden among tombstones or under faux grass in a graveyard scene. Add warm water when the fog starts to subside. The low-lying fog will create a extra spooky vibe.

6. Halloween Punch: Place a smaller bowl inside a larger punch bowl. Put the punch in the inner bowl and the dry ice in the water in the larger bowl. 


Who knew that plain old carbon dioxide could be so fun?!

dry ice halloween experiments and display ideas

Dry Ice Safety Tips:

While dry ice is great fun, it is important to take care when handling. 

1. Never touch dry ice with your bare hands or let it touch bare skin. Always use tongs or heavy duty gloves to avoid frostbite or terrible burns.

2. Keep the dry ice in the styrofoam container until ready to use.

3. Use small pieces of dry ice. 

4. Use in a well-ventilated area. The carbon dioxide gas that is produced as it sublimates can cause suffocation in small spaces.

5. Store dry ice in a well-insulated container but do not seal it tightly, as the pressure build-up from sublimating COâ‚‚ could cause the container to burst.

6. Never ingest dry ice or place it directly in your mouth, as it can cause severe internal burns.

7. For disposal – allow dry ice to sublimate in a well-ventilated area, away from people and pets. Do not dispose of dry ice in sinks, toilets, or trash cans, as it can cause damage.

8. Teach your students the risks of touching dry ice.

9. Always keep out of reach of small children and follow proper safety precautions.


Note: Because dry ice sublimates, you will need to use the dry ice on the day or day after you get it delivered or it will disappear quickly.


RISK ASSESSMENT: 

Make sure you follow your school’s protocol and carry out your own risk assessment.

dry ice halloween experiments and display ideas

Conclusion

Dry ice halloween experiments are a great way to engage students and create a spooky atmosphere!

So make your Halloween lesson spooky with the above dry ice halloween experiments and demonstrations, and don’t forget to order some extra dry ice to create some spooky decorations!

Note: Always consult your school’s specific safety guidelines and policies, and seek guidance from experienced colleagues or administrators when in doubt about safety protocols.

dry ice halloween experiments and display ideas

About the Author

the animated teacher photo logo
Katrina Harte is a multi-award winning educator from Sydney, Australia who specialises in creating resources that support teachers and engage students.

Spring break guide for teachers

Best 7th grade scientific method worksheets and activities

Best 7th grade scientific method worksheets and activities

Best 7th grade scientific method worksheets and activities

I always felt like such a bad teacher when I would pull out the textbook or more boring worksheets for my class to complete.

So… I designed, trialled, re-designed, trialled, and re-designed my own 7th grade scientific method worksheets until I had some that I was both proud to hand out and that my students actually enjoyed completing!

In this blog post, you will be introduced a range of engaging 7th grade scientific method worksheets and activities to help students learn and consolidate understanding of the scientific method.

7th grade scientific method worksheets and activities

7th grade scientific method worksheets

Why teach the scientific method in 7th grade?


So, why do we teach the scientific method to seventh graders? Well, let’s break it down. Picture yourself back in seventh grade – awkward, curious, and trying to make sense of the world. That’s where the scientific method swoops in like a superhero to save the day!

First off, the scientific method isn’t just some boring formula scientists use; it’s a mindset, a way of thinking. It’s about asking questions, making observations, and testing ideas to find answers. And trust me, in the chaos of adolescence, having a structured approach to figuring things out is like having a secret weapon.


Seventh grade is this magical time when kids start to really question things. Like, why is the sky blue? How do plants grow? Why do cats always land on their feet? Teaching the scientific method at this age gives them the tools to investigate these mysteries on their own. It’s empowering, you know?

Plus, let’s not forget about critical thinking. In today’s world, where information comes at us faster than ever, being able to sift through the noise and separate fact from fiction is crucial. The scientific method teaches kids to be skeptical, to ask for evidence, and to draw their own conclusions based on data – skills that’ll serve them well for life, not just in science class.


And let’s not overlook the hands-on aspect. Seventh graders are all about getting their hands dirty (literally sometimes), so why not let them dive into experiments and see science in action? Whether it’s mixing chemicals in a lab or planting seeds in the garden, the scientific method makes learning tangible and, dare I say, fun.

7th grade scientific method worksheets and activities

What needs to be taught for the scientific method in 7th grade?

7th grade scientific method worksheets and activities

In seventh grade, introducing the scientific method involves focusing on its core components in a way that’s engaging and accessible to students. Here’s a breakdown of the key aspects that should be taught:

1. Observation: Teach students how to keenly observe the world around them. Encourage them to use their senses to gather information and notice patterns or anomalies. Simple exercises like observing the behavior of animals or changes in weather can kickstart their observation skills.

2. Questioning: Foster a culture of curiosity by encouraging students to ask questions about what they observe. Teach them how to formulate clear and testable questions that can be investigated scientifically. For instance, why does a candle flame flicker? How does the amount of sunlight affect plant growth?

3. Hypothesis: Help students understand the concept of a hypothesis – a tentative explanation or prediction based on observations and prior knowledge. Show them how to make educated guesses about the outcomes of their investigations. Encourage them to use “if…then” statements to articulate their hypotheses.

4. Experimentation: Introduce the idea of designing experiments to test hypotheses. Teach students how to identify variables (independent, dependent, and controlled), how to include a control group, and how to set up fair tests to collect data. Hands-on activities and simple experiments can bring this aspect to life, allowing students to see the scientific method in action.

5. Data Collection and Data Analysis: Guide students in collecting data using appropriate tools and methods. Teach them how to record their observations systematically and accurately. In particular, it is important that students know how to graph results in an appropriate style of graph for the data collected. Show them how to organize data in tables or charts and analyze patterns to draw conclusions.

6. Conclusion: Emphasize the importance of drawing conclusions based on evidence gathered during experimentation. Encourage students to reflect on their findings and assess whether they support or refute their hypotheses. Teach them to communicate their conclusions clearly and objectively.

7. Iteration: Highlight that science is an ongoing process of inquiry and discovery. Teach students that it’s okay if their hypotheses are not supported by initial experiments – that’s how science works! Encourage them to revise their hypotheses and design new experiments to further investigate their questions.

7th grade scientific method worksheets and activities

Check out these awesome 7th grade scientific method worksheets that incorporate fun scenarios, colorful clipart and challenging activities to keep students engaged.

7th grade scientific method worksheets and activities

7th grade scientific method worksheets 

​

1. Scientific method booklet (teacher & student) – This is a great way to structure your lessons and work your way through the scientific method.

2. Scientific variables worksheet (dragon themed) – students often have trouble identifying the different types of variables. This is a fun way for students to practice this skill.

3. Scientific variables worksheet (valentine’s day themed) – this worksheet has 10 fun valentines day scenarios for students to identify the dependent, independent and controlled variables.

4. Scientific variables worksheet (halloween themed) – practice identifying variables with these spooky scenarios!

5. Scientific method color by number this is an easy activity to print and give your students for review or to have as an early finisher activity.

6. Scientific method crosswordthis is another easy activity to print and give your students for review or to have as an early finisher activity.

7. FREE scientific method posters – Free printable posters to put up around your room!

​7th grade scientific method worksheets and activities

7th grade scientific method activities 

8. Scientific method escape room – review key terms and skills for the scientific method with an escape room!

9. Scientific method 2-player racing game – get your students’ competitive nature going with this two player racing game!

10. Lab safety escape rooma key component of the scientific method, and being able to carry out their own experiments, is that they can work in the lab safely. Make it fun with this escape room!

11. Graphing skills escape room – review key skills for graphing in science with an escape room!

12. Following instructions rainbow lab – this is a great way to introduce the scientific method and the importance of following instructions and measuring accurately.

​13.Scientific Method Bundlegrab a heap of the scientific method resources with a huge discount in this bundle!

Note: ​the above resources are suitable for 6th grade, 7th grade and 8th grade.

7th grade scientific method worksheets and activities

Conclusion

 Knowledge of the scientific method is crucial for students to be able to conduct their own scientific investigations in order to answer a scientific question.

These 7th grade scientific method worksheets and activities are a far stretch from the normal, boring classroom resources.

Using these types of activities also play a part in helping students develop understanding of the real world applications of the scientific method. 

7th grade scientific method worksheets and activities

Note: Always consult your school’s specific safety guidelines and policies, and seek guidance from experienced colleagues or administrators when in doubt about safety protocols.

About the Author

the animated teacher
Katrina Harte is a multi-award winning educator from Sydney, Australia who specialises in creating resources that support teachers and engage students.

Station activities for middle school

10 FREE Digital Resources for Middle School Science

10 FREE Digital Resources for Middle School Science

10 FREE Digital Resources for Middle School Science

In today’s digital age, the integration of technology in education has become necessary. In this blog post, I’ve curated a list of 10 FREE digital resources for middle school science that have scientifically accurate information, amazing visual representation of difficult concepts, and an interactive nature.

Spring break guide for teachers

free digital resources for middle school science

Digital resources for middle school science

1. PhET Interactive Simulations

PhET Interactive Simulations provides a vast collection of free, research-based interactive math and science simulations. Covering topics from physics to biology, these simulations allow students to explore and experiment with various scientific phenomena in a virtual environment.

2. Google Earth for Education

Google Earth for Education takes geography to a whole new level by providing a platform for virtual exploration of the world. Science teachers can use this tool to create custom tours, explore ecosystems, and even examine geological features from satellite imagery.

3. Biodigital Human

The Biodigital Human platform is a 3D interactive visualization tool that allows students to explore the human body in detail. This resource is invaluable for teaching anatomy, physiology, and health-related topics.

digital resources for middle school science  

4. National Geographic Education

National Geographic Education offers a wealth of resources for science educators, including lesson plans, maps, videos, and interactive features. It’s an excellent source for incorporating real-world examples and exploration into your lessons.

5. NASA’s Eyes on the Solar System

NASA’s Eyes on the Solar System is a powerful visualization tool that allows users to explore the cosmos in real-time. Teachers can use this resource to take their students on virtual tours of the solar system and beyond.

6. Edpuzzle

Edpuzzle is an innovative platform that allows teachers to turn any video into an interactive lesson. You can add questions, quizzes, and comments to videos, ensuring that students are actively engaged with the content.

7. Quizlet

Quizlet is a versatile learning platform that offers tools for creating flashcards, quizzes, and interactive games. Science teachers can use Quizlet to reinforce vocabulary, concepts, and processes in an engaging and effective manner.

digital resources for middle school science  

8. Virtual science teachers

Virtual science teachers provides a whole range of free simulations and lessons suitable for middle school science.


9. The Royal Society

The Royal Society has a selection of online science games aimed at middle school science. These add some variety and fun into science lessons while still engaging students in the content.


10. Wolfram

Wolfram has a range of free virtual labs for high school physics, chemistry and biology.


You may also like my blog post on 15 free virtual dissection labs. 

digital resources for middle school science  

Conclusion

Incorporating these digital resources for middle school science can breathe new life into your lessons and provide students with dynamic, interactive learning experiences. 

digital resources for middle school science  

About the Author

the animated teacher photo logo
Katrina Harte is a multi-award winning educator from Sydney, Australia who specialises in creating resources that support teachers and engage students.

Spring break guide for teachers

10 tools to help teachers check for chat gpt and ai use

10 tools to help teachers check for chat gpt and ai use

10 tools to help teachers check for chat gpt and ai use

With the rapid growth of online content sees the rise of ai-generated content and artificial intelligence, it is important to be able to detect ai written content in student submission of work. The use of chatgpt in middle and high school settings has grown astronomically, making it harder for teachers to determine student understanding and whether they have used an ai writing tool. 


In this blog post we will introduce 10 tools teachers can use to check for chat gpt and ai use in student work.

check for chat gpt

What is an AI detector?

An AI detector is a tool or system designed to identify whether a piece of content—such as text, images, audio, or video—was generated or manipulated by artificial intelligence. These detectors employ various techniques to analyze and recognize patterns or anomalies indicative of AI-generated content. 

Using an AI detector can help teachers determine the authenticity of a student submission to mitigate issues such as plagiarism.


How do AI detectors work?

 AI-generated content often has distinct patterns or inconsistencies that can be detected using statistical methods and machine learning. AI detectors use advanced algorithms to pick up these inconsistencies by monitoring unusual patterns in the creation or distribution of content. 


Things to consider when using an ai text detector:

1. False positives: Ensuring accurate results in detection is challenging, with the risk of incorrectly identifying human-generated content as AI-generated and vice versa. Using an AI detector is not always a reliable way to check.

2. Evasion Tactics: As AI detection software improves, AI tools and AI technology also evolve to evade detection, leading to a continuous arms race. The ability for AI to produce human-like text is amazing, but obviously poses continual problems for educators trying to gauge the authenticity of student writing. In the near future it may become near impossible to detect.


The best ways to detect for AI-written content is by using an AI detector alongside knowing your students and their regular writing voice and sentence structure to determine whether it is the student’s own work.


How can teachers use an AI content detector:

Teachers can use AI detectors to ensure the integrity and originality of student work, particularly in academic settings where there is a growing concern about students using AI tools to generate essays, reports, and other assignments. They are also a great tool to use with your students to demonstrate and educate students on academic integrity and encourage the development of original content. While AI continues to pull information from many sources, the intellectual property is in an AI-written text is always questionable.

10 tools to check for chat gpt and ai use


10 AI detecting tools to help teachers check for chat gpt and ai use


The following are the best ai detection tools for educators:

Note: depending on the length of the text, most of these websites provide a Free AI detector for a certain word count. 

 10 tools to check for chat gpt and ai use

1. Turnitin – Well-known for plagiarism detection, Turnitin has integrated features to detect AI-generated content. This is commonly used in university to check academic papers, and also in high school settings. 

2. Grammarly – Primarily a grammar checker, Grammarly also offers some AI detection capabilities in its premium versions.

3. Copyleaks – Provides AI content detection alongside traditional plagiarism detection.

4. Unicheck – An academic integrity tool that includes AI text detection in its features.

5. GPTZero – Specifically designed as a reliable chatgpt detector tool to detect chatgpt-generated text by AI models like GPT-3.

6. Content at Scale AI Detector – A free tool for detecting AI-generated content.

7. Sapling.ai – Offers AI writing assistance and detection of AI-generated text as an ai plagiarism checker.

8. Originality.AI – A plagiarism and AI detection tool tailored for web publishers and academic institutions.

9. Writer.com AI Content Detector – Helps identify AI-generated content in various types of text.

10. Crossplag – Another plagiarism detection tool that can check for chat gpt and AI content.

10 tools to check for chat gpt and ai u


Conclusion

These tools vary in their features and capabilities, so it’s worth exploring a few to find the one that best meets your needs. If you have large projects or regular projects you need to check, it may be worth paying for a suitable subscription.


I hope these tools help for you to check for chat gpt and AI use in your classes.

10 tools to check for chat gpt and ai use

the animated teacher logo

Katrina is a multi-award winning educator from Sydney, Australia who specialises in creating resources that support teachers and engage students.

See the quality and browse her best selling resources below on either The Animated Teacher website or on Teachers Pay Teachers:

Lab Safety 101: for Middle and High School Science Teachers

Lab Safety 101: for Middle and High School Science Teachers

Lab Safety 101: for Middle and High School Science Teachers

As a new science teacher, one of the most daunting aspects was trying to get my head around lab safety. There were so many rules and procedures, not just for me but also my students and it was very overwhelming. 

This guide will walk you through essential safety protocols, tips for setting up a safe laboratory environment, and provide resources for teaching lab safety effectively in a middle or high school environment.

lab safety 101 for science teachers a tray of gloves and safety glasses

Disclaimer: This blog post, ‘Lab Safety 101: A Comprehensive Guide for Middle and High School Science Teachers’, may contain links to resources that I have created for classroom use. Read full disclaimer here. activ

Understanding the Importance of Lab Safety

Before diving into the specifics, it’s crucial to recognize the significance of lab safety. The laboratory is a space where students engage in hands-on learning, often with potentially hazardous materials and equipment.

By establishing a culture of safety, you not only protect your students but also foster an environment that encourages curiosity, exploration, and a lifelong love of science.

Essential Lab Safety Protocols

1. Safety Briefings and Demonstrations

Begin every lab session with a safety briefing. Emphasize key safety rules, potential hazards, and the proper use of equipment. Consider demonstrating techniques and procedures to ensure students have a clear understanding.

2. Safety Equipment and Emergency Procedures

Familiarize students with the location and proper use of safety equipment, including eyewashes, fire extinguishers, first aid kits, and emergency exits. Conduct regular drills so that everyone knows what to do in case of an emergency.

3. Personal Protective Equipment (PPE)

Require students to wear appropriate PPE, including lab coats or aprons, safety goggles, and closed-toe shoes. Stress the importance of wearing these items at all times while in the lab.

4. Handling Chemicals

  • Store chemicals properly, following manufacturer guidelines.
  • Label all containers clearly, including any secondary containers.
  • Never mix chemicals unless directed to do so by the experiment instructions.
  • Provide proper ventilation when working with volatile substances.

5. Handling Glassware and Equipment

  • Inspect glassware for cracks or defects before use.
  • Instruct students on proper techniques for handling, cleaning, and storing glassware and equipment.

6. Waste Disposal

Clearly designate and label waste disposal containers for different types of waste (e.g., chemicals, broken glass). Teach students how to dispose of materials safely and in compliance with local regulations.

Setting Up a Safe Laboratory Environment

1. Lab Layout and Organization

  • Arrange workstations to allow for easy movement and supervision.
  • Keep aisles and exits clear of obstructions.
  • Provide clear signage indicating safety equipment and emergency exits.

2. Storage and Labeling

  • Store chemicals, glassware, and equipment in designated areas.
  • Clearly label shelves and containers to indicate contents and hazards.

3. Ventilation and Fume Hoods

Ensure adequate ventilation in the lab to prevent the buildup of fumes or gases. If available, instruct students on the proper use of fume hoods.

4. Safety Inspections and Maintenance

Regularly inspect equipment, safety devices, and emergency systems. Address any issues promptly and keep a record of maintenance activities.

5. Safety Documentation

Maintain up-to-date records of safety protocols, emergency procedures, and any incidents or accidents that occur in the lab.


Classroom resources for teaching lab safety

1. Lab safety contract – this was actually a game changer for me in my middle school classroom. By having a lab safety contract that students signed, it gave students a sense of seriousness and ownership over the lab and their behaviour in it. It also gave me something to refer back to if I felt students weren’t behaving properly, and to remind them of the consequences of it (which they agreed to when they signed it!)
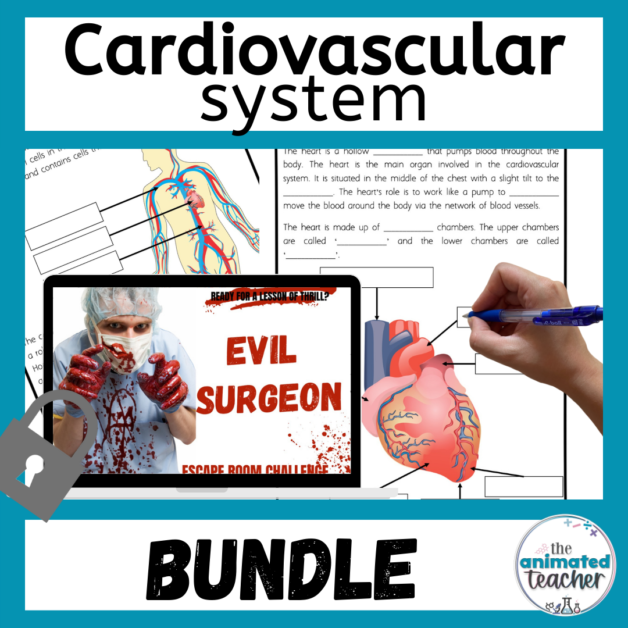
2. Lab safety posters – these are great to have as visual reminders of lab safety protocol, as well as being a part of your classroom decor! 

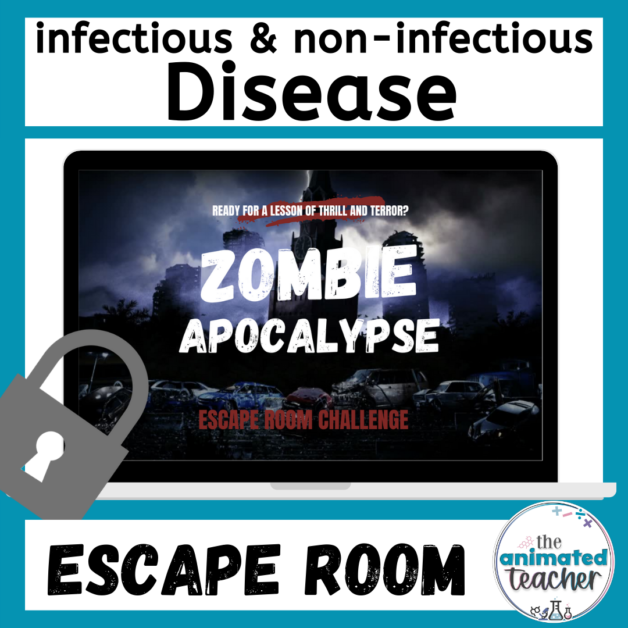
3. Lab safety escape room – want a fun way to review lab safety rules and procedures? This escape room is a super fun way to have students engage in revising these – perfect for the start of the school year! 

4. Bunsen burner licence – My middle school students LOVE getting their Bunsen burner licences. It makes them feel like they have accomplished something and the physical certificate is something they really value.
5. Rainbow Lab Following Instructions this Rainbow lab is a great back to school activity as it impresses the importance of following instructions and taking precise measurements.


Resources for Teaching Lab Safety

1. American Chemical Society (ACS) Safety Guidelines

The ACS provides a wealth of resources, including safety guidelines, lesson plans, and videos to help teach lab safety effectively. ACS Safety Guidelines

2. Flinn Scientific Safety Resources

Flinn Scientific offers a range of safety resources, including safety data sheets, instructional videos, and safety posters. Flinn Safety Resources

3. Occupational Safety and Health Administration (OSHA) Lab Safety

OSHA provides a comprehensive guide to lab safety, including regulations, training resources, and hazard communication guidelines. OSHA Lab Safety

4. National Science Teachers Association (NSTA) Safety Resources

NSTA offers a variety of safety resources, including articles, lesson plans, and safety checklists for science teachers. NSTA Safety Resources

Conclusion

As a new science teacher, prioritizing lab safety lays the foundation for a successful and enriching learning experience. By instilling proper safety protocols, maintaining a safe laboratory environment, and utilizing resources for teaching lab safety, you create an environment where students can explore the wonders of science with confidence and curiosity.

Remember, safety is not just a rule, but a culture that fosters a lifelong appreciation for the scientific process and ensures the safety of all students and teachers.

Note: Always consult your school’s specific safety guidelines and policies, and seek guidance from experienced colleagues or administrators when in doubt about safety protocols.


About the Author

the animated teacher photo logo
Katrina Harte is a multi-award winning educator from Sydney, Australia who specialises in creating resources that support teachers and engage students.

Spring break guide for teachers