9 Great Ways to Teach Variables in Science Experiments

9 Great Ways to Teach Variables in Science Experiments

9 Great Ways to Teach Variables in Science Experiments

Science is a journey of exploration and discovery, and at the heart of every scientific experiment lies the concept of variables. Variables in science experiments are the building blocks of experimentation, allowing scientists to manipulate and measure different elements to draw meaningful conclusions.

Teaching students about variables is crucial for developing their scientific inquiry skills and fostering a deeper understanding of the scientific method.

In this blog post, we’ll explore the importance of teaching variables in science experiments, delve into the distinctions between independent, dependent, and controlled variables, and provide creative ideas on how to effectively teach these variable types.

So grab a coffee, find a comfy seat, and relax while we explore fun ways to teach variables in science experiments! 

ways to teach variables in science experiments

The Importance of Teaching Variables in Science Experiments:


  • Foundation of Scientific Inquiry: Variables form the bedrock of the scientific method. Teaching students about variables helps them grasp the fundamental principles of scientific inquiry, enabling them to formulate hypotheses, design experiments, and draw valid conclusions.


  • Critical Thinking Skills: Understanding variables cultivates critical thinking skills in students. It encourages them to analyze the relationships between different factors, question assumptions, and think systematically when designing and conducting experiments.


  • Real-world Application: Variables are not confined to the laboratory; they exist in everyday life. Teaching students about variables equips them with the skills to critically assess and interpret the multitude of factors influencing phenomena in the real world, fostering a scientific mindset beyond the classroom.


In addition to the above, understanding scientific variables is crucial for designing an experiment and collecting valid results because variables are the building blocks of the scientific method.

A well-designed experiment involves the careful manipulation and measurement of variables to test hypotheses and draw meaningful conclusions about the relationships between different factors. Here are several reasons why a clear understanding of scientific variables is essential for the experimental process:

1. Precision and Accuracy: By identifying and defining variables, researchers can design experiments with precision and accuracy. This clarity helps ensure that the measurements and observations made during the experiment are relevant to the research question, reducing the likelihood of errors or misinterpretations.

2. Hypothesis Testing: Variables in science experiments are central to hypothesis formulation and testing. A hypothesis typically involves predicting the relationship between an independent variable (the one manipulated) and a dependent variable (the one measured). Understanding these variables is essential for constructing a hypothesis that can be tested through experimentation.

3. Controlled Experiments: Variables, especially controlled variables, enable researchers to conduct controlled experiments. By keeping certain factors constant (controlled variables) while manipulating others (independent variable), scientists can isolate the impact of the independent variable on the dependent variable. This control is essential for drawing valid conclusions about cause-and-effect relationships.

4. Reproducibility: Clear identification and understanding of variables enhance the reproducibility of experiments. When other researchers attempt to replicate an experiment, a detailed understanding of the variables involved ensures that they can accurately reproduce the conditions and obtain similar results.

5. Data Interpretation: Knowing the variables in science experiments allows for a more accurate interpretation of the collected data. Researchers can attribute changes in the dependent variable to the manipulation of the independent variable and rule out alternative explanations. This is crucial for drawing reliable conclusions from the experimental results.

6. Elimination of Confounding Factors: Without a proper understanding of variables, experiments are susceptible to confounding factors—unintended variables that may influence the results. Through careful consideration of all relevant variables, researchers can minimize the impact of confounding factors and increase the internal validity of their experiments.

7. Optimization of Experimental Design: Understanding variables in science experiments helps researchers optimize the design of their experiments. They can choose the most relevant and influential variables to manipulate and measure, ensuring that the experiment is focused on addressing the specific research question.

8. Applicability to Real-world Situations: A thorough understanding of variables enhances the applicability of experimental results to real-world situations. It allows researchers to draw connections between laboratory findings and broader phenomena, contributing to the advancement of scientific knowledge and its practical applications.

The Different Types of Variables in Science Experiments:

There are 3 main types of variables in science experiments; independent, dependent, and controlled variables.

1. Independent Variable:

The independent variable is the factor that is deliberately manipulated or changed in an experiment. The independent variable affects the dependent variable (the one being measured).

Example: In a plant growth experiment, the amount of sunlight the plants receive can be the independent variable. Researchers might expose one group of plants to more sunlight than another group.

2. Dependent Variable:

The dependent variable is the outcome or response that is measured in an experiment. It depends on the changes made to the independent variable.

Example: In the same plant growth experiment, the height of the plants would be the dependent variable. This is what researchers would measure to determine the effect of sunlight on plant growth.

3. Controlled Variable:

Controlled variables, also called constant variables, are the factors in an experiment that are kept constant to ensure that any observed changes in the dependent variable are a result of the manipulation of the independent variable. These are not to be confused with control groups.

In a scientific experiment in chemistry, a control group is a crucial element that serves as a baseline for comparison. The control group is designed to remain unchanged or unaffected by the independent variable, which is the variable being manipulated in the experiment.

The purpose of including a control group is to provide a reference point against which the experimental results can be compared, helping scientists determine whether the observed effects are a result of the independent variable or other external factors.

Example: In the plant growth experiment, factors like soil type, amount of water, type of plant and temperature would be control variables. Keeping these constant ensures that any differences in plant height can be attributed to changes in sunlight.

Science variables in science experiments


Best resources for reviewing variables in science experiments:


If you’re short on time and would rather buy your resources, then I’ve compiled a list of my favorite resources for teaching and reviewing variables in science experiments below. While there is nothing better than actually doing science experiments, this isn’t feasible every lesson and these resources are great for consolidation of learning:

1. FREE Science Variables Posters: These are perfect as a visual aide in your classroom while also providing lab decorations! Print in A4 or A3 size to make an impact.

2. Variable scenarios worksheet printable: Get your students thinking about variable with these train your pet dragon themed scenarios. Students identify the independent variable, dependent variable and controlled variables in each scenario.

3. Variable Valentines scenarios worksheet printable: Get your students thinking about variables with these cupid Valentine’s Day scenarios. Students identify the independent variable, dependent variable and controlled variables in each scenario.

4. Variable Halloween scenarios worksheet printable: Spook your students with these Halloween themed scenarios. Students identify the independent variable, dependent variable and controlled variables in each scenario.

5. Scientific Method Digital Escape Room: Review all parts of the scientific method with this fun (zero prep) digital escape room! 

6. Scientific Method Stations Printable or Sub Lesson: The worst part of being a teacher? Having to still work when you are sick! This science sub lesson plan includes a fully editable lesson plan designed for a substitute teacher to take, including differentiated student worksheets and full teacher answers. This lesson involves learning about all parts of the scientific method, including variables.


9 Teaching Strategies for Variables in Science Experiments

To help engage students in learning about the different types of scientific variables, it is important to include a range of activities and teaching strategies. Here are some suggestions:

1. Hands-on Experiments: Conducting hands-on experiments is one of the most effective ways to teach students about variables. Provide students with the opportunity to design and conduct their experiments, manipulating and measuring variables to observe outcomes.

Easy science experiments you could include might relate to student heart rate (e.g. before and after exercise), type of ball vs height it bounces, amount of sunlight on the growth of a plant, the strength of an electromagnet (copper wire around a nail) vs the number of coils.

Change things up by sometimes having students identify the independent variable, dependent variable and controlled variables before the experiment, or sometimes afterwards.

Consolidate by graphing results and reinforcing that the independent variable goes alone the x-axis while the dependent variable goes on the y-axis.

2. Teacher Demonstrations:

Use demonstrations to illustrate the concepts of independent, dependent, and controlled variables. For instance, use a simple chemical reaction where the amount of reactant (independent variable) influences the amount of product formed (dependent variable), with temperature and pressure controlled.

3. Case Studies:

Introduce case studies that highlight real-world applications of variables in science experiments. Discuss famous experiments or breakthroughs in science where variables played a crucial role. This approach helps students connect theoretical knowledge to practical situations.

4. Imaginary Situations:

Spark student curiosity and test their understanding of the concept of variables in science experiments by providing imaginary situations or contexts for students to apply their knowledge. Some of my favorites to use are this train your pet dragon and Halloween themed variables in science worksheets.

5. Variable Sorting Activities:

Engage students with sorting activities where they categorize different variables in science experiments into independent, dependent, and controlled variables. This hands-on approach encourages active learning and reinforces their understanding of variable types.

6. Visual Aids:

Utilize visual aids such as charts, graphs, and diagrams to visually represent the relationships between variables. Visualizations can make abstract concepts more tangible and aid in the comprehension of complex ideas.

7. Technology Integration:

Leverage technology to enhance variable teaching. Virtual simulations and interactive apps can provide a dynamic platform for students to manipulate variables in a controlled environment, fostering a deeper understanding of the cause-and-effect relationships.

Websites such as Phet are a great tool to use to model these types of scientific experiments and to identify and manipulate the different variables

8. Group Discussions:

Encourage group discussions where students can share their insights and experiences related to variables in science experiments. This collaborative approach promotes peer learning and allows students to learn from each other’s perspectives.

9. Digital Escape Rooms:

Reinforce learning by using a fun interactive activity like this scientific method digital escape room.

Conclusion

Teaching variables in science experiments is an essential component of science education, laying the groundwork for critical thinking, inquiry skills, and a lifelong appreciation for the scientific method.

By emphasizing the distinctions between independent, dependent, and controlled variables and employing creative teaching strategies, educators can inspire students to become curious, analytical, and scientifically literate individuals. 


What are your favorite ways to engage students in learning about the different types of variables in science experiments? Comment below!


Note: Always consult your school’s specific safety guidelines and policies, and seek guidance from experienced colleagues or administrators when in doubt about safety protocols. 

Teaching variables in science experiments

About the Author

the animated teacher photo logo

Station activities for middle school

27 Fun Valentines Day Science Activities and Experiments

27 Fun Valentines Day Science Activities and Experiments

27 Fun Valentines Day Science Activities and Experiments

Engaging with special occasions like Valentine’s Day is a great way to engage students in science concepts. There are endless possibilities of fun Valentines day science activities that you can use to teach students about the wonders of science. 


In this blog post I will share 27 Valentines day science activities and experiments that are easy to set up and engaging for kids of all ages. 

Valentines day science activities and experiments


Valentine's Day Science Activities and Experiments

No prep Valentines Day science activities and worksheets:


1. Digital escape room: Escape rooms are always a hit in my classroom. This Valentine’s day escape room is zero prep and its a fun way to review key concepts related to the scientific method.


2. Scientific variables worksheets: Create Valentine’s themed scenarios of experiments for students to identify the independent, dependent and controlled variables. If you want one that is done for you, download this Valentine’s Day Worksheet here.


3. Keyword summaries: Have students review content and keywords using this FREE resource. Students record everything they know about a keyword on each heart, then put it together to make a Valentines Day bauble! These look awesome hung around the classroom.


4. Heart label and color: Study the heart and cardiovascular system with this FREE label and color activity.


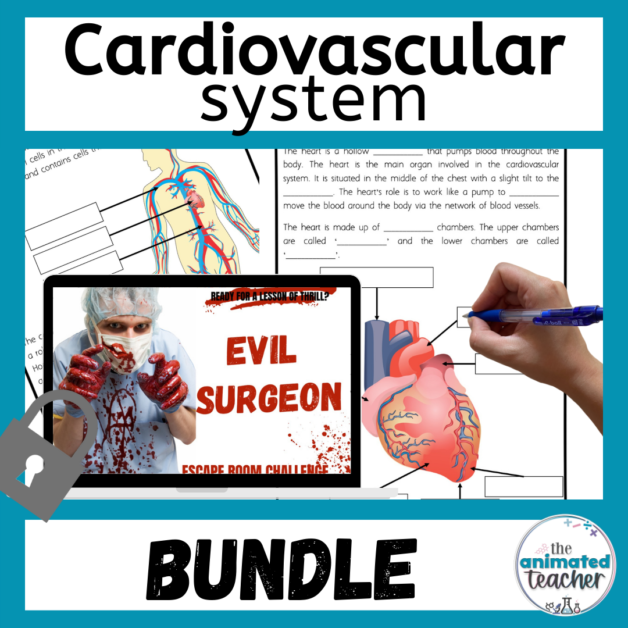
5. Study the cardiovascular system: Take it a step further and really delve into the cardiovascular system with these cardiovascular system stations and activities.


6. Run a “speed-dating” activity: This is one of my favorite (and easiest) educational activities to increase engagement in the classroom. Set up desks so students are opposite each other. Students have 2 minutes (1 minute each) to tell the other person everything they know about a particular topic. Once the buzzer goes, students on one side move around to the next person (like speed dating). Middle school students think this is particularly fun.

Valentines day science activities and experiments

​

Valentine Science Experiments

Valentine’s Day simple science experiments can make science fun and engaging for middle and high school students. Here’s an outline of 21 easy science experiments that incorporate elements of Valentine’s Day:


1. Candy Heart Dissolving Rates:

  • Investigate how different liquids (water, soda, vinegar) affect the dissolution rate of candy hearts. Students will have fun watching the fizzy hearts dissolve and predicting which liquid will dissolve them the fastest.

2. Chromatography Valentines:

  • Use chromatography to separate the colors in water-soluble markers to create vibrant heart shape patterns. This could also be done to separate the colors in a heart shaped or valentines day candy.

3. Heartbeat Monitor:

  • Measure heart rate before and after different activities (walking, jumping) to understand the cardiovascular system. To make it extra valentine’s day theme, have students dance to romantic music and measure heart rate before and after!

4. Balloon Rocket Race:

  • Explore the principles of action and reaction by launching heart balloon rockets and timing their races.

5. Love Potion Science experiment:

  • Experiment with liquids of varying densities to create a “love potions” with layered colors.

6. Magnetic Attraction:

  • Investigate the magnetic properties of different materials. Use iron filings and a magnet to create magnetic valentines artworks.

7. Valentine’s Slime:

  • Make slime with a twist by incorporating Valentine’s Day-themed colors and glitter.

8. pH Color Changing Flowers:

  • Explore the acidity or alkalinity of different solutions by placing white flowers in them and observing color changes.

9. Heart-shaped Paper Circuit:

  • Introduce basic circuitry by creating a heart-shaped paper circuit with LED lights.

10. Sweet DNA Extraction:– Extract DNA from strawberries to demonstrate the basics of genetics in a sweet way. This is my favorite valentines science experiment for high school students as they are always surprised you can actually extract the DNA from something.

Valentines day science activities and experiment

11. Lovey-Dovey Egg Drop:– Design and test egg drop containers to protect “love birds” (eggs) from falling heights.


12. Floating Hearts:– Experiment with the concept of buoyancy by creating heart-shaped boats from various materials.


13. Valentine’s Day Volcano:– Build a mini volcano using baking soda and vinegar with red food coloring for a festive eruption.


14. Candy Chromatography:– Separate the colors in different candies using chromatography to understand the composition.


15. Lava Lamp:– Create a lava lamp using alka-seltza tablets, oil and water use pink color food dye in the water to make it extra valentines themed.


16. Cupid’s Bow and Arrow Physics:– Investigate the principles of force, energy, and trajectory by making and testing Cupid’s bows and arrows.


17. Lovey-Dovey Light Reflection:– Use mirrors to explore the reflection of light and create heart-shaped patterns.


18. Heart Anatomy Model:– Construct a simple model of the human heart using everyday materials to learn about its structure.


19. Sweet Heat:– Explore how different substances affect the melting rate of chocolates in this tasty experiment.


20. Love in the Air:– Study the concept of air pressure by creating and launching paper bag “heart rockets.”


21. Secret message: This is my favorite fun valentine’s day science activity! use petroleum jelly and a UV light to create secret messages!


Note: Always follow your school’s safety protocol and complete a full risk assessment for every experiment. 


Valentines day science activities and experiments

Conclusion

Valentine’s Day lessons can be so fun and most of these only use simple supplies! 

Comment below with your favorite Valentines Day Science Activities and Experiments.


Note: Always consult your school’s specific safety guidelines and policies, and seek guidance from experienced colleagues or administrators when in doubt about safety protocols.

About the Author

the animated teacher

Station activities for middle school

73 Fun Human Body Systems Activities and Ideas

73 Fun Human Body Systems Activities and Ideas

73 Fun Human Body Systems Activities and Ideas

Middle and high school is a crucial time for students to delve into the fascinating world of human biology and human body systems. Understanding the intricacies of the human body systems can be a challenging but rewarding experience. To make learning engaging and enjoyable, educators can incorporate a variety of hands-on human body systems activities that cater to different learning styles. 


In this blog post, we’ll explore 73 fun and interactive human body systems activities and ideas suitable for middle school students. From cut and paste activities to digital escape rooms, these activities are designed to foster curiosity and deepen understanding.

human body systems activities ideas 

human body systems activities ideas

Disclaimer: This blog post, ‘73 fun human body systems activities and ideas’, may contain links to resources that I have created for classroom use. Read full disclaimer here. activ

In middle school the main individual body systems students need to know include:

  • The digestive system
  • The respiratory system
  • The cardiovascular system
  • The skeletal system
  • The muscular system
  • The nervous system
  • The excretory system
  • The male reproductive system
  • The female reproductive system
  • The immune system

There is a lot to learn in these categories once you take into account the many body parts, functions, major systems, how the systems interact with each other, and the many processes that occur in the human body to keep it alive and well. 

Engage students in learning with the following human body systems activities and ideas.

human body systems activities ideas 

73 Fun Human Body Systems Activities for Middle School


No-prep  Human Body Systems Activities

While the below categories are great to explore, I’m going to start but mentioning my favorite no-prep or print-and-go human body systems activities first. 

Why?

If I have to explain it you’re probably not a teacher! 


  1. Organ Diagram Labelling:

Offer diagrams of specific body systems and have students label the organs using a word bank. This activity enhances anatomical knowledge and helps reinforce the connections between organs. Grab a free copy of my diagram labelling for the heart.


  1. Human Body Systems Stations:

Set up stations around the classroom, each dedicated to a different body system. Students rotate through these stations, engaging in activities related to each system. This approach provides a comprehensive overview of the human body. Grab some ready to print and go here.


  1. Human Body Systems Crossword Puzzles:

Create crossword puzzles with clues related to different body systems. This activity not only reinforces terminology but also encourages critical thinking and problem-solving skills. Grab a bundle of body system crossword puzzles here.


  1. Escape Room Challenges:

Design or use a pre-made digital escape room with puzzles and challenges related to human body systems. Students must solve each puzzle to “escape,” promoting teamwork and critical thinking. These are perfect to do individually or in small groups to engage students and a great way to promote class discussion and collaboration. See my favorite body system digital escape rooms here.


  1. Scaffolded notes

Scaffolded notes or cloze passages are a great way to help students learn in a supportive way and to ensure they all have a full set of notes to revise over later.


6. Doodle Notes 

Encourage students to complete pre-made doodle notes or to create doodle notes illustrating processes like digestion, respiration, or the circulatory system. The act of visually representing processes helps with memory retention, and the creative aspect makes learning more enjoyable. Grab a FREE copy of my cardiovascular doodle notes to see if you like them! 

Note: “Doodle Notes” is a trademarked term used with permission. Please visit doodlenotes.org for more information.

Creative Human Body Systems Activities


  1. Human Body Systems Podcasts:

Assign students the task of creating podcasts discussing different body systems. This activity enhances communication skills and allows students to become teachers themselves. Even just listening to some cool podcasts would be a great addition to the classroom.


  1. Build-a-Body:

Provide students with templates of the human body and various organs. Students can cut and paste the organs onto the body template, creating a visual representation of the human body. 


  1. DIY Model Organs:

Encourage creativity by having students create three-dimensional models of organs using household items like clay, playdough, or recycled materials. This hands-on approach allows for a deeper understanding of organ structure.


  1. Anatomy Coloring Pages:

Provide intricate coloring pages featuring anatomical illustrations. This artistic approach not only relaxes students but also reinforces their understanding of organ placement and structure. 


  1. Body Systems Comic Strips:

Encourage creativity by having students create comic strips illustrating the interactions between different body systems. This artistic approach combines science with storytelling.


  1. DIY Organ T-Shirts:

Bring creativity into the classroom by having students design T-shirts featuring different organs. This artistic activity allows for personal expression while reinforcing knowledge of organ locations.


  1. Systems Songwriting:

Challenge students to write and perform songs about various body systems. This musical approach makes learning memorable and enjoyable.


  1. Bio-Art Gallery:

Host a bio-art gallery where students showcase their artistic representations of different body systems. This interdisciplinary approach combines science with the arts.


  1. Anatomy Rap Battles:

Organize rap battles where students create rhymes and verses related to different body systems. This musical approach combines creativity with scientific knowledge.


  1. Human Body Systems Diorama:

Assign students the task of creating dioramas representing different body systems. This three-dimensional approach reinforces spatial understanding.

human body systems activities ideas  

Technology Human Body Systems Activities


  1. Virtual Dissection:

Explore online resources that offer virtual dissection experiences. These interactive simulations allow students to virtually dissect organs and gain a better understanding of their structures and functions. Click here to see 15 virtual dissection labs.


  1. Interactive Apps:

Explore educational apps that allow students to interact with 3D models of the human body. These apps often include quizzes and challenges to reinforce learning. 


  1. Digital Interactive Notebooks:

Utilize digital platforms for interactive notebooks where students can compile information, images, and videos related to each body system. This method enhances digital literacy while organizing information. 


  1. Body Systems QR Code Trail:

Develop a QR code trail around the school or classroom, with each code leading to information or a challenge related to a specific body system.


  1. Virtual Reality Field Trip:

Explore virtual reality resources that offer immersive experiences inside the human body. This technology provides a unique perspective and enhances spatial understanding.


  1. Interactive Worksheets:

Design worksheets with interactive elements such as drag-and-drop features, clickable links, and multimedia integration to engage students in an online environment.

23. Disease Simulations:

Simulations depicting the impact of diseases on specific body systems allow students to witness the consequences of diseases on organs and systems, gaining a deeper understanding of pathology.

human body systems activities ideas 

human body systems activities mega bundle

Video Human Body Systems Activities

Incorporating video lessons into the curriculum adds a dynamic visual element, catering to various learning styles. These videos can range from animated explanations to real-life dissections, bringing the subject matter to life.

24.  Virtual Tours of Organs:

Utilize virtual tours or 3D animations to explore the structures of organs like the heart, lungs, and brain. This visual experience enhances understanding and retention.

25. Documentary on Body Systems:

Show documentaries that provide a comprehensive overview of the human body systems. Discuss the real-world applications of the knowledge gained from studying these systems.

26. Interviews with Experts:

Feature interviews with healthcare professionals, scientists, or researchers discussing their work related to human body systems. This provides insights into the practical applications of the knowledge being taught.

27. Historical Perspectives:

Explore the historical development of our understanding of human anatomy and physiology. Discuss key discoveries and the scientists who played pivotal roles.

28. Animated Cell Processes Videos: Watch animations illustrating cellular processes.

29. Virtual Reality Body Systems Exploration: Use virtual reality for an immersive exploration.

30. Biographical Videos on Scientists: Learn about scientists who contributed to anatomy.


31. Live Dissection Demonstrations: Stream live dissection demonstrations for real-time learning.

32. Digital Microscope Exploration: Explore microscopic structures using digital microscopes.

33. Virtual Field Trip to Medical Facilities: Virtually visit hospitals or labs to see medical practices.

34. TED-Ed Talks: Watch TED-Ed talks explaining biological concepts related to human body systems.

35. Interactive 3D Anatomy Videos: Explore interactive 3D videos illustrating anatomy.

36. Human Body Systems Webinars: Attend webinars led by experts in the field.

37. Online Courses on Human Anatomy: Enroll in online courses for in-depth learning.

38. Scientific Experiments Videos: Watch videos of scientific experiments related to body systems.

39. Virtual Exploration of Medical Imaging: Explore medical imaging techniques virtually.

40. Biomechanics in Sports Videos: Understand the role of body systems in sports biomechanics.

41. Time-Lapse Videos of Cellular Processes: Observe time-lapse videos of cellular activities.

42. Historical Anatomy Documentaries: Dive into documentaries exploring the history of anatomy.


Research Human Body Systems Activities


43. Human Body Systems Timeline:

Challenge students to create a timeline showcasing the development of their understanding of human body systems. This activity fosters a sense of historical perspective and the evolution of scientific knowledge. This could also be done by researching the development of our understanding as technological advancements have led to an increase in our knowledge and understanding.

44. Body Systems Concept Maps:

Have students create concept maps illustrating the connections between various body systems. This visual representation helps them see the bigger picture and understand the interdependence of systems. Another fun modification of this is setting up the different body systems around the classroom, then using string to draw connections between those that interact together. This creates a great web and demonstrates the complexities of the human body.

45. Human Body Systems Trading Cards:

Encourage students to create trading cards featuring different body systems. This activity combines research and creativity, and students can trade cards to reinforce learning.


46. Case Studies:

Present real-life case studies involving issues within specific body systems. Students analyze the cases, propose solutions, and discuss the implications.


47. Body Systems Debate:

Organize debates where students argue for or against specific practices or technologies related to human body systems. This activity develops critical thinking and argumentation skills.

human body systems activities ideas 

Hands-on & Experiments Human Body Systems Activities

Engaging students in hands-on experiments is a powerful way to deepen their understanding of human body systems. These experiments not only provide practical experience but also foster critical thinking and problem-solving skills. Here are a few examples:

48. Heart Rate Investigation:

Students explore the relationship between physical activity and heart rate.

Have students measure their resting heart rate, perform various exercises, and record how their heart rate changes. Discuss the impact of exercise on the cardiovascular system.

    49. Digestive System Model:

    Students create a model of the digestive system using household items. Students can simulate the journey of food through the digestive tract, emphasizing the role of enzymes and organs.

    50. Lung Capacity Test:

    Students explore the respiratory system function by measuring their lung capacity using simple experiments like a balloon and straw test. Discuss the importance of lung capacity in the respiratory system.

    51. Sensory Perception Challenge:

    Blindfold students and have them rely on other senses to identify objects.

    Discuss how the brain processes sensory information and the role of the nervous system in perception.

    52. Reflex Arc Test

    Students test how fast their reflex arc is by dropping a ruler and seeing at what distance a peer was able to catch it. Grab a copy of this with full notes here.

    53. Sensory Perception Challenge: Explore sensory perception by relying on non-visual senses.


    54. Cellular Respiration Experiment: Demonstrate the process of cellular respiration using simple materials.


    55. Blood Typing Activity: Simulate blood typing using safe, household items.


    56. Muscle Contraction Demonstration: Explore muscle contractions using rubber bands or strings.


    57. Circulatory System Pump Model: Build a model demonstrating how the heart pumps blood.


    58. Kidney Filtration Experiment: Simulate kidney filtration using a simple filtration setup.

    59. Interactive Brain Hemisphere Model: Create a hands-on model showcasing the functions of brain hemispheres.

    60. Hormone Release Simulation: Demonstrate how hormones are released into the bloodstream.

    61. Respiratory System Model: Build a model demonstrating the movement of air through the respiratory system.

    62. Taste Bud Mapping: Explore taste bud locations on the tongue through tasting activities.


    63. Endocrine System Hormone Relay: Simulate the relay of hormones through the endocrine system.


    64. Joint Movement Demonstrations: Perform activities to understand the range of joint movements.


    65. Skin Sensation Experiment: Investigate skin sensitivity using different stimulis


    66. Visualizing Blood Flow: Use colored water to visualize blood flow through vessels.


    67. Interactive Eye Model: Create a model demonstrating how the eye focuses on objects.

    68. Simulated Immune Response: Explore the immune system’s response to invaders through a role-play.

    69. Modeling Nerve Impulses: Use dominoes or other props to simulate nerve impulses.


    70. Cut & paste activities: cut and paste to organise key term and definition, or body system and organ etc.

    human body systems activities ideas 

    Fun Human Body Systems Activities


    71. Body Systems Board Game:

    Develop a board game where players navigate through the human body systems, answering questions and completing challenges to advance. This game format makes learning fun and competitive. To save you some preparation time, you could even get each student to write a question to enter into the board game rather than you creating them all yourself. Enter your email here and I’ll send you a free board game template!


    72. Human Body Systems Jeopardy:

    Create a Jeopardy-style game with questions related to various body systems. Students can compete individually or in teams, testing their knowledge in a fun and interactive way.


    73. Human Body Systems Scavenger Hunt:

    Create a scavenger hunt where students search for clues related to different body systems. This activity promotes teamwork and problem-solving skills.

    human body systems activities ideas 

    Conclusion


    Incorporating these diverse approaches—science experiments, video lessons, interactive simulations, and graphic organizers—ensures that educators cater to different learning needs, making the study of human body systems not only educational but also enjoyable and memorable for middle school students.

    By making science fun and engaging, educators can inspire a lifelong curiosity about the wonders of the human body.

    Comment below with your favorite ways to teach students about the human body systems including your best human body activities. 


    Note: Always consult your school’s specific safety guidelines and policies, and seek guidance from experienced colleagues or administrators when in doubt about safety protocols. 40 fun candy science experiments


    About the Author

    the animated teacher photo logo

    human body systems activities ideas 

    10 Best back to school science activities for middle school

    10 Best back to school science activities for middle school

    10 Best back to school science activities for middle school

    Coming back to school after a nice break can be exciting as well as daunting. It can be hard to switch your brain from holiday mode to work mode. Add the pressure of trying to make the first few lessons particularly enjoyable for your students and suddenly back-to-school seems all too much.


    Let me help you out with these 10 best back to school science activities for middle school.

    back to school science activities

    Disclaimer: This blog post, ’10 best back to school science activities for middle school’, may contain links to resources that I have created. Read full disclaimer here.

    10 fun back to school science activitie

    Best back to school science activities


    1. All about me in science bunting FREE

    Why not start with a goodie and a freebie?!


    I absolutely HATE doing ice-breaking activities. As an adult a cringe at them. As a student my stomach would sink and my anxiety would skyrocket. 


    While I think it is important to push students out of their comfort zones, I don’t believe the first week of school is the time or place to do this.


    So how do I ‘break the ice’ at the start of year?


    With my All About Me In Science Bunting.


    This a super easy, non-confronting activity to start the year with.


    I find this activity to be a great way to gently introduce students to each other and give you an idea of how they view themselves in science.

    It also doubles as a classroom decoration! 


    Grab it FREE here.


    2. Following Instructions Experiment

    Originally I designed this activity to do with my grade 7 students, but honestly, even my high school students can do with a reminder of how important it is to follow instructions carefully and measure accurately.

    This is a perfect back to school science activity to engage students and remind them of key concepts. 

    It can be daunting for students to follow a scientific method and get their head around all the things that are expected of them during an experiment. The Following Instructions Experiment is designed to help students get familiar with following a scientific method step-by-step, working in a group, and taking accurate measurements using a measuring cylinder.

    It assists students to develop their scientific skills including:

    • Working as part of a group
    • Following instructions
    • Measuring accurately
    • Recording qualitative and quantitative results in a table

    Even for students in older year groups, sometimes they just need a little reminder of these skills when returning back to school. 

    Download now.

    10 fun back to school science activities

    sub lesson plan bundle

    ,3. Lab contract and lab safety rules

    Creating a safe classroom environment is important for your students, yourself and your equipment.


    For middle and high schoolers I find it helpful to have something to hold them accountable.


    A lab safety contract is a great way to have students agree to the terms of your laboratory and redirect them to it should they behave in a way contrary to what they had agreed.


    It is also a helpful tool to have to refer parents to if you have any classroom management issues and have to decline students from participating in practical work. 


    4. Lab equipment scavenger hunt

    If you’ve been following my blog for a while then you will know that I LOVE to get my students up and moving around the classroom as much as possible. 


    This lab equipment scavenger hunt is a fantastic way to quickly get students familiar with the laboratory set up while also learning about key pieces of laboratory equipment. 


    This activity develops student skills in reading a dichotomous key, drawing scientific diagrams, identifying scientific equipment, and determining the appropriate use of scientific equipment.


    Get scavenging here.


    5. Scientific equipment digital Escape Room

    If your students are already familiar with your lab and you want a fun back to school science starter to test their memory, then this digital escape room is a no brainer. 


    Digital escape rooms are a fun, engaging way for students to review key terms and content while also building student skills in problem-solving, critical thinking, and collaboration.


    And the winning part? It’s no prep for you! Just share students a link and away they go!


    Enter the escape room now

    10 fun back to school science activities


    6. Bunsen burner licence and checklist

    It never gets old how excited students get to have their own printed ‘Bunsen burner licence’. 


    This one is great because as well as the certificate, there is also a checklist attached that you can use to assess students when they demonstrate their ability to light their Bunsen safely. This then also becomes a helpful reminder they can keep in their books for the rest of the year.


    7. Scientific Variables Scenarios


    I love using these types of scenarios because it tests whether students can transfer their understanding of variables to a variety of situations, not just those typical to a laboratory setting. 


    8. Scientific Method Crossword 

    Crosswords are some kind of magic. Students are immediately drawn to them and engaged. I love this about them! Plus they are low prep – just print and go!


    No matter what topic you are up to in your science curriculum, it is always relevant to review scientific method. This engaging Scientific method crossword comes in two themes and is suitable for both middle and high school students. 

    10 fun back to school science activities

    My favorite back to school Amazon buys

    9. Scientific method digital Escape Room


    There’s a reason teachers keep coming back for my digital escape rooms. They are fun, engaging, and ZERO PREP! All you have to do is share a link with students and away they go.


    Understanding the scientific method is so crucial for students continuing to study science in later years. This escape room provides an interactive way to revise their understanding of the scientific method.


    10. Critical Thinking Puzzle

    I love a good Einstein puzzle to help students develop their critical thinking. 


    What is an Einstein puzzle?


    An Einstein puzzle, is a logic puzzle that involves a scenario with several clues, constraints, and a series of deductions to be made to arrive at a unique solution. The puzzle is named after Albert Einstein, although there is no evidence to suggest that he actually created it.

    My take on this puzzle presents a scenario involving a group of scientists and requires the solver to determine each person’s specialty, university, lab color, computer and favorite drink based on the given clues.

    The goal is to use deductive reasoning to find the correct arrangement that satisfies all the provided conditions.

    10 fun back to school science activities

    Conclusion

    It sucks having to use your hard earned holiday time to prepare for back to school science activities. Do yourself a favor and grab some of these resources to help reduce your preparation time and enjoy more of your holiday!

    10 fun back to school science activities

    About the Author

    the animated teacher photo logo

    Spring break guide for teachers

    Virtual Dissection Labs: 15 FREE interactives

    Virtual Dissection Labs: 15 FREE interactives

    Virtual Dissection Labs: 15 FREE interactives

    Biology is an interesting subject to teach in middle and high school. Not all students love to participate in dissections. From the complaining about the smell, to the fainting or nausea, the classroom can get thrown into the pit of chaos very quickly. Add some scalpels to the mix and it can be the opening to a horror film. 

    To mitigate disaster, I always love to have some virtual dissection labs on hand so that students can still participate, even if they don’t want to do the hands-on lab. Thankfully, technology can make this possible. 

    In this blog post I will explore reasons to use virtual dissection labs, as well as providing a list of 15 FREE interactive and virtual dissection labs. 


    virtual dissection labs

    Disclaimer: This blog post, ’15 FREE interactive and virtual dissection labs’, may contain affiliate links or links to resources that I have created. Read full disclaimer here. activ

     Reasons to use virtual dissection labs


    1. Engagement Beyond the Scalpel:

    Traditional dissections, while valuable, often pose logistical challenges and can be messy affairs. Virtual dissection labs provide a clean and efficient alternative that engages students without the need for scalpels and formaldehyde. The interactive nature of these simulations allows students to explore and dissect various organisms with just a few clicks, fostering a sense of curiosity that extends beyond the physical limitations of the traditional dissection lab.

    2. Inclusivity in Learning:

    Virtual dissection labs break down barriers to entry that traditional labs might present. Students who may be uncomfortable with the tactile nature of dissections due to cultural, religious, or personal reasons can now participate fully in the learning experience. It promotes inclusivity, ensuring that every student, regardless of their background or preferences, has the opportunity to explore the wonders of biology.

    3. Cost-Effective and Sustainable:

    Let’s face it; quality dissection specimens and materials can be expensive. Virtual dissection labs eliminate the need for constant replenishment of supplies, saving both time and budget. 

    4. Repeat and Review at Will:

    With virtual dissections, the learning experience doesn’t end when the bell rings. Students can revisit and repeat the dissection process as many times as needed, reinforcing their understanding of anatomical structures. This feature accommodates different learning styles and paces, allowing each student to grasp concepts thoroughly before moving on.

    5. Real-world Connections:

    Virtual dissection labs offer an opportunity to connect the theoretical concepts taught in the classroom with real-world applications. Simulations can replicate diverse environments, showcasing the adaptations and interdependencies of different species. This not only enhances the students’ understanding of biology but also emphasizes the ecological context of the organisms being studied.

    6. Technological Fluency:

    In an era dominated by technology, it is crucial for students to develop technological fluency. Virtual dissection labs expose them to advanced software, honing their digital literacy skills. These skills are not only valuable in the field of biology but are increasingly essential in many professions in our technology-driven society.

    7. Time Efficiency:

    Traditional dissections can be time-consuming, often spanning multiple class periods. Virtual dissections, on the other hand, can be completed in a fraction of the time, allowing teachers to cover more material within the constraints of a standard class schedule. This time efficiency opens up possibilities for exploring additional topics or conducting supplementary activities.


    The integration of virtual dissection labs into your biology classroom offers a multitude of advantages. From fostering inclusivity and sustainability to promoting technological fluency and real-world connections, these tools are propelling biology education into the future. Embrace the change, and watch your students dissect not only specimens on the screen but also the barriers to their own learning potential.

    My favorite no-prep early finisher activities

    FREE virtual dissection labs:

    Human anatomy


    1. HUMAN BODY SYSTEMS: The InnerBody Website contains FREE interactive body system maps for each of the human body systems. Zoom in to each part of the different body systems with the interactive 2D map. Or change over to a 3D view to see how the various parts all work together. 


    1. NEURON SIMULATION: Explore the parts and function of a neuron in the nervous system with PhET’s interactive neuron simulation. 


    1. NEURONS VIRTUAL LAB: Biointeractive also has an Exploring neurons virtual lab


    1. MUSCULOSKELETAL SYSTEM: Explore the muscular system and skeletal system with interactive games like ‘poke a muscle’ and ‘whack a bone’ at the Anatomy Arcade.


    1. CARDIOLOGY VIRTUAL LAB: The Cardiology virtual lab allows students to explore cardiology and how to diagnose patients with heart conditions.


    1. EXTERNAL EAR INTERACTIVE: The AnatomyZone has a 3D interactive that allows students to explore the features of the external ear and its connections to the nervous system.


    1. HUMAN BODY SYSTEMS: Zygote Body has a 3D interactive where students can view each of the body systems in 3D.

    FREE virtual dissection labs:

    Animal anatomy


    1. ANATOMY OF A DOG: The Anatomy of a dog interactive allows students to understand the musculoskeletal system and nervous system in the context of how a dog bears weight, moves and behaves.


    1. VIRTUAL FROG DISSECTION: Froggy has an interactive, Virtual frog dissection and build-a-frog game to test student knowledge of the parts of the frog and their location. 


    1. VIRTUAL PIG DISSECTION: Even though it is virtual, the Virtual Pig Dissection is not for the faint of heart. The images are realistic and detailed.


    1. CAT ANATOMY: Virtual cat anatomy explorer is a 3D virtual activity where students can delve into the anatomy of a cat and how the cat’s organs and body systems work together


    1. BIRD FEATURES: Use this interactive to build a bird.


    1. MARINE LIFE: Explore the features of marine life through this 3D marine life app.


    1. FISH VIRTUAL LAB: Explore the anatomical structure of a stickleback fish in this virtual lab. Includes student and teacher resources.


    1. LIZARD EVOLUTION: The Evolution of the lizard virtual lab allows students to step back in time to explore the features of lizards and how they have evolved over the years.


    Conclusion

    Virtual dissection labs are a great way to engage students in learning about human and animal biology. 

    Save this blog post and integrate these different technologies in your classes!

    Early Finisher Activities in Science

    About the Author

    the animated teacher photo logo

    Early Finisher Activities in Science

    38 Fun candy science experiments for middle school

    38 Fun candy science experiments for middle school

    38 Fun candy science experiments for middle school

    Integrating candy science experiments isn’t just a treat for the taste buds—it’s a powerful tool that transforms the learning experience for both students and teachers.

    The combination of education and confectionery brings science to life in a way that captivates the imagination, fostering a love for discovery and exploration. In this blog post, we’ll delve into the many reasons why using candy science experiments is more than just a sugar-coated indulgence—it’s a pedagogical strategy that engages students, makes complex concepts tangible, and offers educators a dynamic and enjoyable way to impart knowledge.

    So, let’s unwrap the secrets behind the sweet science of learning with 38 Fun candy science experiments for middle school!

    candy science experiments for middle school

    Disclaimer: This blog post, ‘38 fun candy science experiments for middle school’, may contain affiliate links or links to resources that I have created. Read full disclaimer here. activ

    Reasons to use candy science experiments

    Using candy science experiments to teach scientific concepts can be an engaging and effective way to capture students’ attention and make learning more enjoyable. Here are several reasons why incorporating candy into science lessons can be beneficial:

    1. Tactile Learning: Handling and manipulating candy can provide a hands-on, tactile experience for students. This kinesthetic approach can enhance learning by engaging multiple senses and reinforcing scientific concepts through physical interaction.

    2. Visual Representation: Candy can serve as a visual representation of abstract scientific concepts. For example, using different colored candies to represent different elements in a chemical reaction or molecular structure can make these concepts more tangible and easier to understand.

    3. Motivation and Engagement: The novelty of using candy as a teaching tool can spark students’ interest and motivation. It adds an element of fun to the learning process, making students more likely to actively participate in class activities and discussions.

    4. Real-world Application: Many scientific principles can be illustrated using examples from the real world, and candy provides a familiar context that students can relate to. Exploring concepts like density, solubility, and chemical reactions using candies makes the science more relatable and applicable to everyday life.

    5. Demonstrating Processes: Candy can be used to simulate and demonstrate various scientific processes and can help make complex topics more accessible.

    6. Group Collaboration: Candy-based activities often lend themselves well to group work. Students can collaborate on experiments, share ideas, and problem-solve together. This fosters teamwork and communication skills, which are valuable in both science and everyday life.

    7. Memory Enhancement: Associating scientific concepts with the enjoyment of eating candy can create positive memories and associations. This can contribute to better retention of information as students may remember the lesson more vividly.

    8. Incorporating Creativity: Candy provides a creative medium for students to express their understanding of scientific concepts.

    9. Sensory Experience for Special Needs Students: For students with sensory processing issues or special needs, using candy science experiments can create a more inclusive learning environment. The various textures, colors, and tastes can cater to different sensory preferences.

    Important note: While doing candy science experiments can be effective, it’s essential to ensure that it aligns with educational goals, dietary considerations, and any relevant policies or guidelines in the learning environment. Always remember to conduct a risk assessment for all class activities and experiments.

    40 fun candy science experiments

    40 Fun candy science experiments


    Cool candy science experiments:

    CHEMISTRY (middle & high school)


    1. Candy Molecule Models:

    • Objective: Model molecular structures using different candies.

    • Procedure: Use candies to represent atoms and build simple molecular models.

    • Candy suggestions: mini marshmallows, different colored jelly-type lollies


    2. Candy Chromatography:

    • Objective: Separate colors in candy coatings using chromatography.

    • Procedure: Dissolve candy coatings in water and observe the separation of colors on filter paper.

    • Candy suggestions: jelly beans (the black ones work especially well)


    3. Candy pH Scale:

    • Objective: Test the pH of different candies using pH paper.

    • Procedure: Dip pH paper into candy solutions and match the colors to the pH scale.

    • Candy suggestions: peppermints, skittles,  popping candy


    4. Candy Solubility:

    • Objective: Investigate solubility by dissolving different candies in water or different liquids.

    • Procedure: Test the solubility of various candies and observe dissolving rates.

    • Candy suggestions: peppermints, skittles, jelly beans, pop rocks


    5. Candy Conservation of Mass:

    • Objective: Explore the conservation of mass by observing candy dissolving.

    • Procedure: Weigh candies before and after dissolving to demonstrate mass conservation.

    • Candy suggestions: peppermints, skittles, sugar molecules


    6. Modelling Le Chatelier’s Principle

    • Objective: Model how a reaction reaches equilibrium

    • Procedure: Use m&ms to model reactants and products as they reach equilibrium

    • Candy suggestions: m&ms, skittles


    7. Modelling Le Chatelier’s Principle

    • Objective: Model how an equilibrium is disturbed

    • Procedure: Use m&ms to model reactants and products after a disturbance as they re-reach equilibrium

    • Candy suggestions: m&ms, skittles


    8. Atomic Structure:

    • Objective: Model atomic structure

    • Procedure: Assign different colored lollies to represent protons, neutrons, and electrons. Students model atoms of various elements

    • Candy suggestions: m&ms, skittles


    9. Electron Configuration:

    • Objective: Model electron configuration

    • Procedure: Assign different colored lollies to represent protons, neutrons, and electrons. Students model atoms of various elements and arrange electrons into the electron shells.

    • Candy suggestions: m&ms, skittles


    10. Molecular Bonding:

    • Objective: Model covalent bonding

    • Procedure: Use candies and toothpicks to model how atoms form single, double and triple covalent bonds.

    • Candy suggestions: jelly candies, mini marshmallows


    40 fun candy science experiments

    Candy science experiments: PHYSICS

    11. Density of Candy:

    • Objective: Explore density by comparing the sinking and floating of different candies.

    • Procedure: Drop various candies into water and observe which ones sink or float.

    • Candy suggestions:


    12. Calculating density:

    • Objective: Calculate density of various candies.

    • Procedure: Weigh candy and place in water to measure displacement and determine volume.

    • Candy suggestions: variety of candy that fits in a measuring cylinder e.g. jelly beans, jelly candies


    13. Candy Bar Math:

    • Objective: Practice math skills by measuring and calculating with candy bars.

    • Procedure: Use candy bars to teach concepts like fractions, decimals, and percentages by practicing cutting it up.

    • Candy suggestions: family block of chocolate, or any individual candy bar


    14. Candy Air Pressure:

    • Objective: Demonstrate air pressure using candies and a vacuum pump.

    • Procedure: Use a vacuum pump to observe how candies expand in a low-pressure environment.

    • Candy suggestions: marshmallows, gummy bears


    15. Candy Heat Transfer:

    • Objective: Investigate heat transfer by melting candies with various heat sources.

    • Procedure: Melt candies using methods such as microwaving or hot water baths.

    • Candy suggestions: chocolate, starburst,


    16. Candy Sound Waves:

    • Objective: Visualize sound waves using vibrating candies on a speaker.

    • Procedure: Place candies on a speaker and observe the patterns created by sound vibrations.

    • Candy suggestions: sprinkles


    17. Conduction

    • Objective: Investigate heat transfer by conduction

    • Procedure: Melt chocolate and use it to stick candies at various intervals along a metal rod. Leave to set. Heat from one end using a Bunsen burner and observe the candies fall off in order of distance from the flame. Time each one and graph.

    • Candy suggestions: melted chocolate, candy raspberries or gummy bears.


    18. Energy Transfer:

    • Objective: Observe the transfer of kinetic energy.

    • Procedure: Position lollies in a row, and roll a marble towards them. Observe how the energy transfers from the marble to the lollies, demonstrating the concept of energy conservation.

    • Candy suggestions: gumballs, gobstoppers,


    19. Candy Heat Insulation:

    • Objective: Understand heat insulation by comparing how different candies melt in the sun.

    • Procedure: Place candies of various types in the sun and observe melting rates.

    • Candy suggestions: chocolate buds,


    20. Candy Friction:

    • Objective: Investigate friction using candies on different surfaces.

    • Procedure: Slide candies on various surfaces and observe friction effects.

    • Candy suggestions: variety pack


    40 fun candy science experiments

    fossilization with chocolate

    Simple candy science experiments:

    EARTH SCIENCE

    Some of my favorite candy science experiments are in Earth Science. Due to the nature of the subject, there often aren’t as many experiments or hands-on learning opportunities in comparison with physics and chemistry. However, using candy is a great way to model various concepts and geology information.

    21. Earthquake impacts:

    • Objective: Explore engineering concepts by building structures using candy bars.

    • Procedure: Use marshmallows and spaghetti to create stable structures. Test these structures further to model the impact earthquakes have on building structures.

    • Candy suggestion: marshmallows


    22. Candy Rock Formation:

    • Objective: Simulate the rock cycle using heat and pressure on candy.

    • Procedure: Heat and reshape candies to represent the stages of the rock cycle.

    • Candy suggestions: starburst squares


    23. Candy Rock Types:

    • Objective: Compare the different types of rocks (sedimentary, igneous and metamorphic)

    • Procedure: Find a type of chocolate or candy to represent each rock type and explain the features of the candy and it’s similarities to that rock type

    • Candy suggestions: sedimentary rock: Kit Kat (has layers), igneous rock: cadbury bubbly or aero (air bubbles), metamorphic rock: marvellous creations (mixture)


    24. Make conglomerate:

    • Objective: To model the formation of conglomerate sedimentary rock and small and large clasts.

    • Procedure: Combine all the candies together and ‘cement’ with melted chocolate.

    • Candy suggestions: rice bubbles, maltesers, marshmallows, sprinkles, coconut, tiny teddies, melted chocolate,


    25. Candy Superposition:

    • Objective: Explore geological layers by creating edible rock layers with candies.

    • Procedure: Create layers of jelly and put different candies in each layer to represent different types of  fossils.

    • Candy suggestions: jelly, choc chips, sprinkles, hard candies,


    26. Modelling fossilisation

    • Objective: Model the fossilisation process

    • Procedure: Use melted chocolate and candy dinosaurs to model the fossilisation process.

    • Candy suggestions: milk chocolate, white chocolate, jelly dinosaurs


    27. Modelling half-life

    • Objective: Model and graph the half-life of carbon-14

    • Procedure: Put candies in a container, shake and tip out, remove those face up. Repeat until only 2 left.

    • Candy suggestions: m&ms, skittles


    Easy candy science experiments: BIOLOGY


    1. Classification
    • Objective: Create a dichotomous key to classify different lollies
    • Procedure: Provide a variety of candies and have students design a dichotomous key to classify them
    • Candy suggestions: any variety with enough similarities and differences to classify


    1. DNA Structure:
    • Objective: Model the structure of DNA
    • Procedure: Use toothpicks, long licorice and 4 different colors of mini marshmallows or jelly lollies (to represent ATCG) to model the structure of DNA.
    • Candy suggestions: licorice, mini marshmallows 


    1. Cell Division:
    • Objective: Use candy to represent chromosomes during mitosis.
    • Procedure: use lollies to represent the chromosomes and how they replicate in mitosis
    • Candy suggestions: musk sticks, licorice, nerd ropes,


    1. Food webs:
    • Objective: Model a food web using candy to represent different organisms.
    • Procedure: Use multiple types of candies to represent organisms and toothpicks to show the food chains in the food web. Students also practise creating a key.
    • Candy suggestions: variety pack


    1. Neurons:
    • Objective: Model a neuron 
    • Procedure: Build a model of a neuron using licorice as the axon, gummy bears as neurotransmitters, and different-colored candies as ions. Illustrate how signals are transmitted along the neuron.
    • Candy suggestions: licorice, gummy bears and nerds

    40 fun candy science experiments


    Candy science experiments: SPACE SCIENCE


    1. Edible Solar System:
    • Objective: Model the solar system and relative sizes of the planets
    • Procedure: Use differently-sized candies to represent the planets in our solar system. Arrange them in the correct order and distances from the “Sun” (represented by a larger candy).
    • Candy suggestions: variety of sizes of spherical candy such as gumballs, gobstoppers, skittles,


    1. Phases of the Moon:
    • Objective: Represent the phases of the moon
    • Procedure: Use Oreo cookies to represent the phases of the Moon. Demonstrate how the position of the “sun” (a light source) affects the appearance of the Moon’s surface, allowing students to understand lunar phases.
    • Candy suggestions: Oreo biscuits


    1. Meteor Impact Craters:
      • Objective: observe the impact meteors have on the surface of the earth
      • Procedure: Drop various sizes of candies onto a bed of flour to simulate the impact of meteors on planetary surfaces. Observe and discuss the resulting “craters” and how impact craters provide insights into the history of celestial bodies.
      • Candy suggestions: variety of sizes and shapes of candy such as gumballs, gobstoppers, skittles, nerds, 

      1. Constellation Creation:
        • Objective: Model constellations
        • Procedure: Use toothpicks and small, soft candies to create edible constellations on a flat surface. Discuss the mythology behind constellations and demonstrate how stars form recognizable patterns in the night sky.
        • Candy suggestions: mini marshmallows

        1. Solar Eclipse Simulation:
        • Objective: simulate the occurrence of a solar eclipse
        • Procedure: Use candies to represent the Sun, Earth, and Moon. Create a solar eclipse simulation by positioning the Moon (a smaller candy) between the Earth and the Sun, illustrating how shadows cast by celestial bodies result in solar eclipses.


        1. Star Life Cycle:
        • Objective: model different phases in the life cycle of a star
        • Procedure: Use different types of candies to represent the life stages of a star. Discuss how stars form, go through various phases, and end their life cycles. Relate the sizes and colors of candies to the characteristics of stars.
        • Candy suggestions: variety

        40 fun candy science experiments

        Conclusion

        Using candy science experiments can engage and excite students in a way nothing else can! It only seems right that we use that to our advantage to make learning in science fun!

        Students will have a great time experimenting with the candy, making it a memorable learning experience for them. A lot of the ideas above would also make great science projects for younger kids for further investigation. 


        Please comment with your favorite ways to incorporate candy science experiments below!


        Note: Always consult your school’s specific safety guidelines and policies, and seek guidance from experienced colleagues or administrators when in doubt about safety protocols. 40 fun candy science experiments


        About the Author

        the animated teacher photo logo

        Spring break guide for teachers